EDD email marketing integration automation flow showing purchase triggers, buyer segmentation, welcome sequences, and win-back campaigns

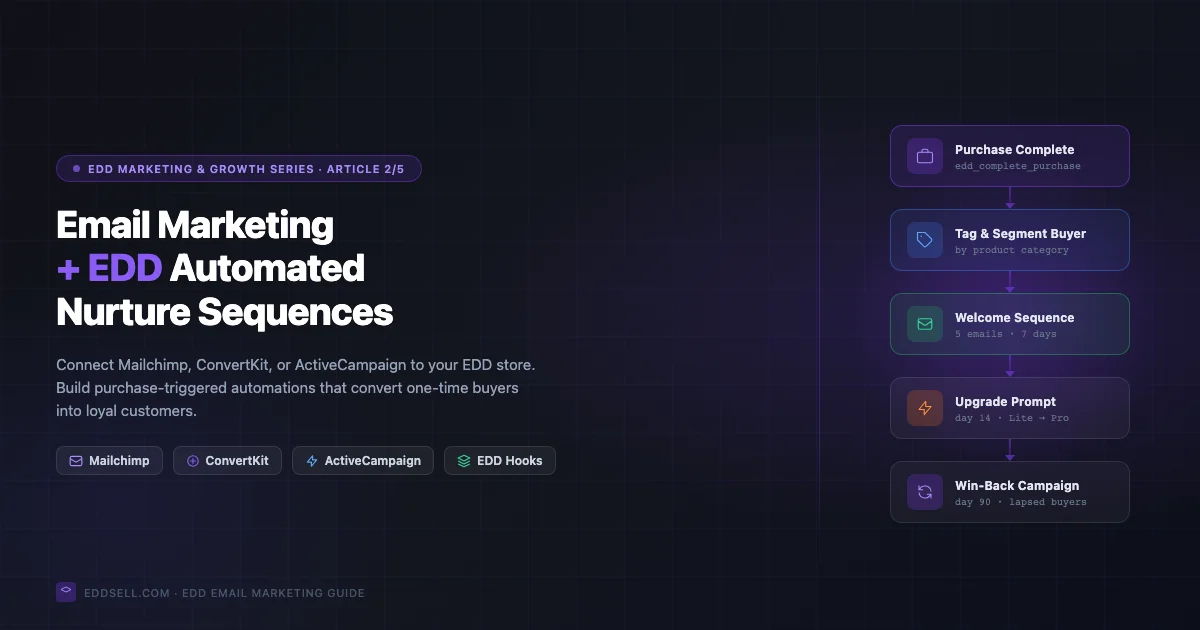
How to Integrate Email Marketing with EDD for Automated Customer Nurture Sequences

Most digital product sellers treat email marketing as an afterthought. They set up Easy Digital Downloads, launch a product, and only think about email when sales go quiet. That’s a missed opportunity. Buyers of digital products are some of the highest-LTV customers you can get, and a well-built email automation stack turns every EDD purchase into the start of a relationship, not just a transaction.

This guide covers how to connect EDD to the major email platforms, which automations drive the most revenue, and exactly how to set them up, including the WordPress hooks that fire on purchase so you can build custom integrations if the native extensions don’t fit your stack.

Why Email + EDD Outperforms Generic E-commerce

Physical product buyers often make one purchase and disappear. Digital product buyers behave differently. A plugin developer who buys one WordPress tool is likely shopping for five more. A designer who downloads one template pack will return for the next collection. A course student who completes one module is primed for an upsell.

The numbers back this up. Returning customers spend an average of 67% more per order than first-time buyers, and acquiring a new customer costs five times more than retaining an existing one. For digital products, where you have zero inventory cost on re-sales, that math is even more favorable.

EDD has a built-in purchase history for every customer. Combined with the right email platform, you can segment by product purchased, days since last purchase, total spend, and license status. That level of targeting is what separates stores doing $2k/month from those doing $20k/month from the same traffic.

The Buyer Intent Signals You Already Have

Every EDD transaction creates a data point you can use in email targeting. When someone buys a plugin, they signal their tech stack. When they buy a course, they signal their skill level. When they renew a license, they signal intent to stick around. These signals are far richer than what most e-commerce stores collect, because digital products have clear use cases that map to real problems.

The goal is to build automations that respond to these signals in real time. A customer who just bought a beginner-level Photoshop tutorial should get a different follow-up sequence than one who bought your advanced retouching course. EDD makes this segmentation possible. The right email platform makes it executable.

Email Platform Options: Mailchimp, ConvertKit, and ActiveCampaign

EDD has official extensions for the three platforms most digital sellers use. Here’s how they compare and when to pick each one.

EDD + Mailchimp

The EDD Mailchimp extension is the most popular starting point. It adds an opt-in checkbox to the EDD checkout and syncs customer data to a Mailchimp audience on purchase. You can map EDD fields to Mailchimp merge tags, push customers to specific groups based on product purchased, and trigger Mailchimp automations from purchase events.

Install path: EDD dashboard > Extensions > Mailchimp. After activation, go to Downloads > Settings > Integrations > Mailchimp. Enter your Mailchimp API key, select the audience, and choose whether to double opt-in or single opt-in. For digital product stores where buyers have already given consent at checkout, single opt-in typically performs better since it avoids friction in the confirmation flow.

Best for: Stores just starting with email automation, teams comfortable with Mailchimp’s visual editor, and sellers who want a simple opt-in-at-checkout approach without complex conditional logic.

Limitations: Mailchimp’s automation builder (Customer Journeys) is powerful but can get expensive as your list grows. Tag-based segmentation works, but ActiveCampaign handles complex conditional sequences more cleanly.

EDD + ConvertKit

The EDD ConvertKit extension connects each EDD product to a ConvertKit sequence or form. When a customer purchases, they get subscribed and tagged automatically. ConvertKit’s tag system is a natural fit for digital product sellers because you can assign different tags to each product and build targeted follow-up sequences that only fire for buyers of a specific item.

Install path: EDD dashboard > Extensions > ConvertKit. After activation, go to Downloads > Settings > Integrations > ConvertKit. Enter your ConvertKit API key. Then, on each individual product’s edit screen, you’ll see a ConvertKit panel where you can assign a specific Form ID or Sequence ID for that product’s buyers. This per-product configuration is what makes ConvertKit stand out for stores with multiple distinct product lines.

Best for: Content creators, course sellers, and indie developers who have distinct product lines that need separate nurture sequences. If you sell five different plugins that serve different audiences, ConvertKit’s per-product tagging keeps your lists clean.

Limitations: ConvertKit’s e-commerce reporting is lighter than ActiveCampaign’s. If you want deep purchase history analysis inside your email platform, you’ll need to push data via the API or use a third-party sync.

EDD + ActiveCampaign

The EDD ActiveCampaign extension is the most capable option for stores with complex automation needs. It pushes customer data, purchase history, and product tags into ActiveCampaign, which then lets you build automations using deal pipelines, lead scoring, and conditional branching that Mailchimp and ConvertKit can’t match.

Install path: EDD dashboard > Extensions > ActiveCampaign. After activation, go to Downloads > Settings > Integrations > ActiveCampaign. Enter your API URL and API key (found in ActiveCampaign under My Settings > Developer). You can then map EDD custom fields to ActiveCampaign contact fields and assign automation triggers per product.

Best for: High-volume stores, SaaS-adjacent products with renewal cycles, and any seller who needs lead scoring or CRM-style contact management alongside email automation.

Limitations: ActiveCampaign has the steepest learning curve. The automation builder is powerful but takes time to configure correctly. It’s also the most expensive of the three at scale.

Quick Decision Guide

ScenarioBest Choice
Just getting started, single productMailchimp
Multiple products, creator-style contentConvertKit
Complex automations, license renewals, high volumeActiveCampaign
Need deep CRM + email in oneActiveCampaign
Tight budget, simple list buildingMailchimp (free tier)

Purchase-Triggered Automations: The Core Sequences

The most valuable automations in any digital product store fire immediately after purchase. EDD gives you reliable WordPress hooks to build these triggers, and the official extensions surface most of them without custom code.

EDD Purchase Hooks You Need to Know

If you’re using a custom integration or building on top of the official extensions, these are the two primary hooks that fire when a purchase completes:

// Fires immediately when a payment reaches "complete" status
add_action( 'edd_complete_purchase', 'your_function_name', 10, 3 );
// Parameters: $payment_id, $payment_data, $customer_id

// Alternative hook - fires on payment status change to "publish" (complete)
add_action( 'edd_payment_complete', 'your_function_name', 10, 1 );
// Parameter: $payment_id

The difference: edd_complete_purchase fires after all internal EDD processing finishes and passes the full payment data array. edd_payment_complete fires earlier in the payment lifecycle and only passes the payment ID. For email integrations, edd_complete_purchase is the safer choice because you can pull product names, customer email, and download IDs directly from the $payment_data array without additional database queries.

A basic custom integration that tags a buyer in your email platform looks like this:

add_action( 'edd_complete_purchase', 'tag_buyer_in_email_platform', 10, 3 );
function tag_buyer_in_email_platform( $payment_id, $payment_data, $customer_id ) {
    $email = $payment_data['email'];
    $downloads = $payment_data['cart_details'];

    foreach ( $downloads as $download ) {
        $product_name = $download['name'];
        // Call your email platform API here with $email and $product_name
    }
}

First-Purchase Welcome Sequence

The welcome sequence is your most important automation. It sets expectations, reduces support requests, and plants the seed for the next purchase. A well-structured welcome sequence for digital products typically runs 5 emails over 7 days.

  • Email 1 (Immediate): Purchase confirmation with download link, license key if applicable, and a direct path to the product. This replaces or supplements EDD’s built-in purchase receipt. Keep it short. The buyer wants the download, not a newsletter.
  • Email 2 (Day 1): Getting started guide. Link to your documentation, a video walkthrough, or your top 3 tips for getting value fast. This dramatically reduces the “I can’t figure this out” support tickets.
  • Email 3 (Day 3): Check-in email. Ask one question: “Did you get [Product Name] working?” This is conversational and has high reply rates, which helps deliverability.
  • Email 4 (Day 5): Use case or success story. Show what other customers have built or done with the product. Social proof reinforces the purchase decision and surfaces upgrade paths.
  • Email 5 (Day 7): Soft upgrade prompt. Introduce a related product or the Pro version if they bought the free/lite edition. Frame it as “the natural next step.”

In ConvertKit, set up a Sequence tagged to your product and drop each email as a new sequence email at the day intervals above. In ActiveCampaign, create a new Automation that starts on “Contact tagged” with your product tag. In Mailchimp, use Customer Journeys with a “Purchase” trigger point.

Post-Download Follow-Up

EDD logs every download event. If you want to trigger an automation specifically when a customer accesses their download link (not just when they pay), hook into edd_process_download_headers. This lets you send a “You just downloaded X, here’s how to get started” email at the moment they actually open the product, not just when the payment processes.

This is especially useful for free products and free trials where there’s no payment event to hook into. A user who downloads your free plugin and gets a targeted onboarding sequence is far more likely to convert to paid than one who downloads and hears nothing.

Upgrade Prompt Sequences

If you sell tiered products (Lite, Pro, Agency), the upgrade sequence is where EDD’s purchase data becomes very valuable. You can identify everyone who bought the Lite version and hasn’t bought Pro, then run a targeted sequence showing them exactly what they’re missing.

The sequence structure that converts best for digital product upgrades:

  • Email 1 (Day 14 after Lite purchase): Feature gap email. List the top 3 features in Pro they can’t access. Make it specific: “Lite supports 1 site. Pro supports unlimited.” Not: “Pro has more features.”
  • Email 2 (Day 21): Social proof from Pro users. One or two testimonials from customers who upgraded and what changed for them.
  • Email 3 (Day 30): Time-limited offer. 20% off Pro for the next 5 days. Only send this to Lite buyers who haven’t visited your Pro sales page in the past 7 days (requires tracking).

Segmentation by Product: Keeping Your Lists Organized

The biggest mistake EDD store owners make with email is sending everything to everyone. Buyers of your PDF design templates don’t care about your WordPress plugin updates. Segmentation by product keeps your list engaged and your unsubscribe rate low.

Tagging Buyers by Product Type

The cleanest approach is to use EDD product categories as the basis for your email tags. If your EDD store has categories like “WordPress Plugins,” “Design Templates,” and “Video Courses,” those should map directly to tags in your email platform.

With the EDD ConvertKit extension, you can assign a specific tag to each product on the product edit screen. With ActiveCampaign, you can use the custom field mapping to push the product category as a contact field, then build automations that branch based on that field.

For a manual approach using WordPress hooks and the Mailchimp API:

add_action( 'edd_complete_purchase', 'segment_buyer_by_category', 10, 3 );
function segment_buyer_by_category( $payment_id, $payment_data, $customer_id ) {
    $email = $payment_data['email'];

    foreach ( $payment_data['cart_details'] as $item ) {
        $download_id = $item['id'];
        $categories  = wp_get_post_terms( $download_id, 'download_category', array( 'fields' => 'slugs' ) );

        // $categories now contains slugs like 'wordpress-plugins', 'design-templates'
        // Use these to assign tags via your email platform API
    }
}

Separate Lists vs. Tags: Which to Use

Tags are almost always better than separate lists for product segmentation. Here’s why: a customer who buys a plugin and then a design template belongs in both segments. With separate lists, you’d have them in two places and risk double-emailing. With tags, they’re in one contact record with multiple tags, and you can build automations that filter by any combination of tags.

The exception is if you have completely separate brands or product lines with zero audience overlap. In that case, separate audiences (lists) make sense to keep billing and reporting clean.

Win-Back Campaigns for Lapsed Customers

A lapsed customer, someone who bought from you 90 or more days ago and hasn’t purchased since, is your warmest cold lead. They already trust you enough to buy once. The win-back sequence is about reminding them you exist and giving them a reason to come back.

Lapsed Customer Sequence Structure

Set up your win-back automation to fire when a contact reaches a specific “days since last purchase” threshold. In ActiveCampaign, this is a date-based automation. In ConvertKit, you’ll need to use a tag added by a webhook or a manual segment export and re-import. Mailchimp handles this well with their “Date” conditions in Customer Journeys.

  • Email 1 (Day 90): “We miss you” without the cringe. Be specific: “You downloaded [Product Name] 3 months ago. Here’s what’s new since then.” List 2-3 updates or new products relevant to their purchase history.
  • Email 2 (Day 97): New product spotlight. Feature a product they haven’t bought that’s in a category they’ve shown interest in. Make the connection explicit: “Since you use X, you’ll want to look at Y.”
  • Email 3 (Day 104): Discount trigger. Offer 15-20% off their next purchase. Set a 7-day expiry. Only fire this if they haven’t clicked or purchased from the previous two emails.

Discount Triggers Based on Purchase History

EDD’s discount system lets you create personalized discount codes. You can generate a unique code per customer via the edd_add_discount function and include it in your win-back email. This avoids the problem of a shared code leaking to coupon sites.

// Generate a unique discount code for a specific customer
$discount_data = array(
    'name'              => 'WINBACK-' . $customer_id,
    'code'              => 'WINBACK' . strtoupper( substr( md5( $customer_id . time() ), 0, 6 ) ),
    'status'            => 'active',
    'uses'              => 0,
    'max_uses'          => 1,  // Single use only
    'amount'            => '20',
    'type'              => 'percent',
    'start'             => date( 'Y-m-d H:i:s' ),
    'expiration'        => date( 'Y-m-d H:i:s', strtotime( '+7 days' ) ),
    'single_use'        => true,
);
$discount_id = edd_store_discount( $discount_data );

Pass this generated code to your email platform via a custom field and insert it dynamically into the win-back email. Single-use, customer-specific codes convert better than shared codes because they feel personal and can’t be diluted by public sharing.

Review Request Sequences: Timing and Approach

Reviews build social proof that converts future buyers. The challenge is asking at the right moment without being annoying. For digital products, the right moment depends on the product type.

Timing by Product Type

  • WordPress plugins: Wait 14-21 days. The buyer needs time to activate, configure, and actually use the plugin before they can give a meaningful review. Asking on day 3 gets you vague reviews or no response.
  • Design templates: 7-10 days. Templates are used faster. By day 7, the buyer either used it on a project or decided it wasn’t right for them.
  • Online courses: After a key milestone, not on a timer. If you can trigger the review request when they complete a module or a quiz, that’s far better than a fixed time delay. EDD’s built-in course features or an integration with LearnDash can expose completion hooks.
  • Software / SaaS tools: 30 days. Give them time to integrate the tool into their workflow and see real results.

What to Ask in the Review Email

The best review request emails do three things: remind the customer what they bought, tell them exactly where to leave the review, and make it take less than 2 minutes.

Example subject line: “Quick question about [Product Name]” (not “Leave us a review” which signals work).

Body: “You downloaded [Product Name] [X] days ago. We’d love to hear how it’s working for you. It takes about 90 seconds: [direct link to review page].” That’s it. No long preamble, no list of review platforms to choose from, one link, one action.

Handling Negative Reviews

Add a filter step before the public review request. Two days before sending the review request, send a private satisfaction check: “How’s [Product Name] working for you? Any issues, reply here and we’ll sort it.” If they respond with a problem, your support team handles it before a bad review gets posted. If they don’t respond or respond positively, the automated review request goes out on schedule.

This two-step approach routes unhappy customers to support before they hit your public review pages. It doesn’t suppress legitimate negative reviews, it ensures people have a chance to get their problems solved first.

Product Launch Email Funnels

When you launch a new product, your existing customer list is your fastest path to early sales. A structured launch sequence, sent only to relevant segments of your list, consistently outperforms cold traffic.

Pre-Launch Sequence

Start building anticipation 7-14 days before launch. The pre-launch sequence has one goal: get subscribers to click “Notify me when it launches” or reply to express interest. This identifies your hottest prospects for the launch day email.

  • Pre-launch Email 1 (Day -14): Teaser. “We’re building something new. It solves [specific problem]. Stay tuned.” Link to a pre-launch landing page if you have one.
  • Pre-launch Email 2 (Day -7): Behind the scenes. Show a screenshot, a feature list, or a short video. Ask: “Would this solve [specific problem] for you? Reply yes or no.” Replies build the launch waitlist.
  • Pre-launch Email 3 (Day -2): Final reminder. “Launching in 48 hours. Early buyers get [bonus, discount, or priority support].” Create urgency without fake countdown timers.

Launch Day Sequence

  • Launch Email 1 (Morning): It’s live. Direct product link, price, key features, and any launch-only bonus. No fluff. Send to your full relevant segment.
  • Launch Email 2 (Afternoon, same day): Send only to non-openers of Email 1 with a different subject line. Not a resend of the same email, a fresh angle: lead with the use case instead of the product name.

Cart-Close Sequence

If you’re running a time-limited launch offer, the cart-close sequence drives a significant spike in conversions in the final 24-48 hours.

  • 48 hours before close: “Last 48 hours at launch price.” Remind them of what the price goes up to after close. Real numbers: “Today $49, after Thursday $79.”
  • 24 hours before close: Objection handler. Address the top reason people don’t buy: “Not sure if it’s right for you? Here’s exactly who it’s built for [list 3 buyer profiles].”
  • 2 hours before close: Final call. Short, direct. “The launch price closes at midnight. Link: [URL].” Send only to non-buyers who opened at least one previous launch email.

In EDD, you can set a sale price with an end date on any product. Use this alongside your cart-close email to enforce the price increase automatically, so you don’t have to remember to manually change it at midnight.

Advanced Integration Tips

Using EDD Webhooks for Custom Integrations

If none of the native extensions fit your stack, EDD’s webhook system (available via the EDD Zapier extension or a custom implementation) lets you send purchase data to any platform that accepts a webhook payload. This opens up integrations with platforms like Drip, Klaviyo, HubSpot, or a custom CRM without needing a dedicated EDD extension.

The EDD Zapier extension fires a webhook on edd_complete_purchase and sends the full payment record including customer email, products purchased, payment amount, and transaction ID. On the Zapier side, you can route this to virtually any email or CRM platform with a native Zapier integration.

License Renewal Automation with EDD Software Licensing

If you sell plugins or software with the EDD Software Licensing extension, renewal reminders are one of the highest-ROI automations you can build. The extension fires edd_sl_pre_license_expiry a configurable number of days before expiry. Hook into this to push a renewal reminder to your email platform.

// Fires before a license expires - configure days in EDD > Settings > Licenses
add_action( 'edd_sl_pre_license_expiry', 'send_renewal_reminder_to_email_platform', 10, 1 );
function send_renewal_reminder_to_email_platform( $license_id ) {
    $license  = edd_software_licensing()->get_license( $license_id );
    $customer = new EDD_Customer( $license->customer_id );
    $email    = $customer->email;
    $expires  = $license->expiration;
    // Push $email and $expires to your email platform via API
}

Build a 3-part renewal sequence: 30 days before expiry (heads up), 7 days before (urgent reminder with renewal link), and 1 day before (final warning). After expiry, a 7-day and 30-day reactivation offer with a discount can recover a percentage of lapses.

Email Deliverability for EDD Stores

Transactional emails (purchase receipts, download links) and marketing emails should come from different sending domains or subdomains. Many EDD stores send everything from their main domain, which means a spam report on a promotional email can hurt delivery of purchase receipts.

Set up SPF, DKIM, and DMARC on your sending domain. Use a dedicated sending IP for high-volume marketing sends if you’re on ActiveCampaign or a platform that supports it. Keep your list clean by running a re-engagement sequence before removing inactive subscribers rather than deleting them immediately.

Measuring Email Automation Performance

The key metrics for an EDD email automation stack are different from a standard newsletter. Open rate and click rate matter, but revenue per email and sequence completion rate are what actually tell you if the automation is working.

  • Revenue per email sent: Total revenue attributed to the sequence divided by total emails sent. Benchmark: welcome sequences should generate $0.50-$2.00 per email sent for digital products.
  • Sequence completion rate: What percentage of subscribers make it through the full welcome or nurture sequence without unsubscribing? Below 60% signals the content or cadence needs adjustment.
  • Purchase attribution window: Set a 7-day attribution window for marketing emails. If someone clicks your upgrade prompt and buys within 7 days, that counts as the email’s conversion. Longer windows inflate attribution numbers.
  • List health: Monitor unsubscribe rate per sequence. If a specific sequence has an unsubscribe rate above 1% per email, the sequence is too aggressive or the targeting is off.

EDD’s built-in reports show revenue by product and by date. Cross-reference these with your email platform’s campaign reports to identify which sequences are driving the most incremental revenue.

Getting Started: Your First 30 Days

If you’re starting from scratch, here’s the order to build these automations:

  1. Week 1: Install your chosen email extension (Mailchimp, ConvertKit, or ActiveCampaign). Connect it to your EDD store. Test the opt-in at checkout by making a test purchase and verifying the subscriber appears in your email platform.
  2. Week 2: Build the welcome sequence for your top-selling product. Five emails, 7 days. Get this live before building anything else. The welcome sequence has the highest ROI of all automations.
  3. Week 3: Add product-based tagging to all products in your catalog. Set up the segmentation logic so future automations can filter by product type.
  4. Week 4: Build the win-back sequence for customers who haven’t purchased in 90 days. Export your lapsed customer list, import it into your email platform, and start the sequence.

After month one, add review request sequences and upgrade prompts for your Lite-to-Pro conversion path. Save the launch funnels for when you have a new product ready.

The stores that get the most from EDD email integration are not the ones with the most complex automations. They’re the ones with the most consistent fundamentals: a solid welcome sequence, clean segmentation by product, and a reliable win-back sequence that runs on autopilot. Start there, then layer in complexity as you have data to guide the decisions.

For more on extending EDD beyond out-of-the-box functionality, see our guide on using EDD webhooks for store automation, our breakdown of custom reports and analytics in EDD for tracking the metrics that matter most to digital product sellers, and our deep-dive on EDD discount codes and promotional pricing for building time-limited offers into your win-back sequences.

Leave a Comment

Your email address will not be published. Required fields are marked *

Scroll to Top