10 Best Software for Video Color Grading

What Video Color Grading Actually Does
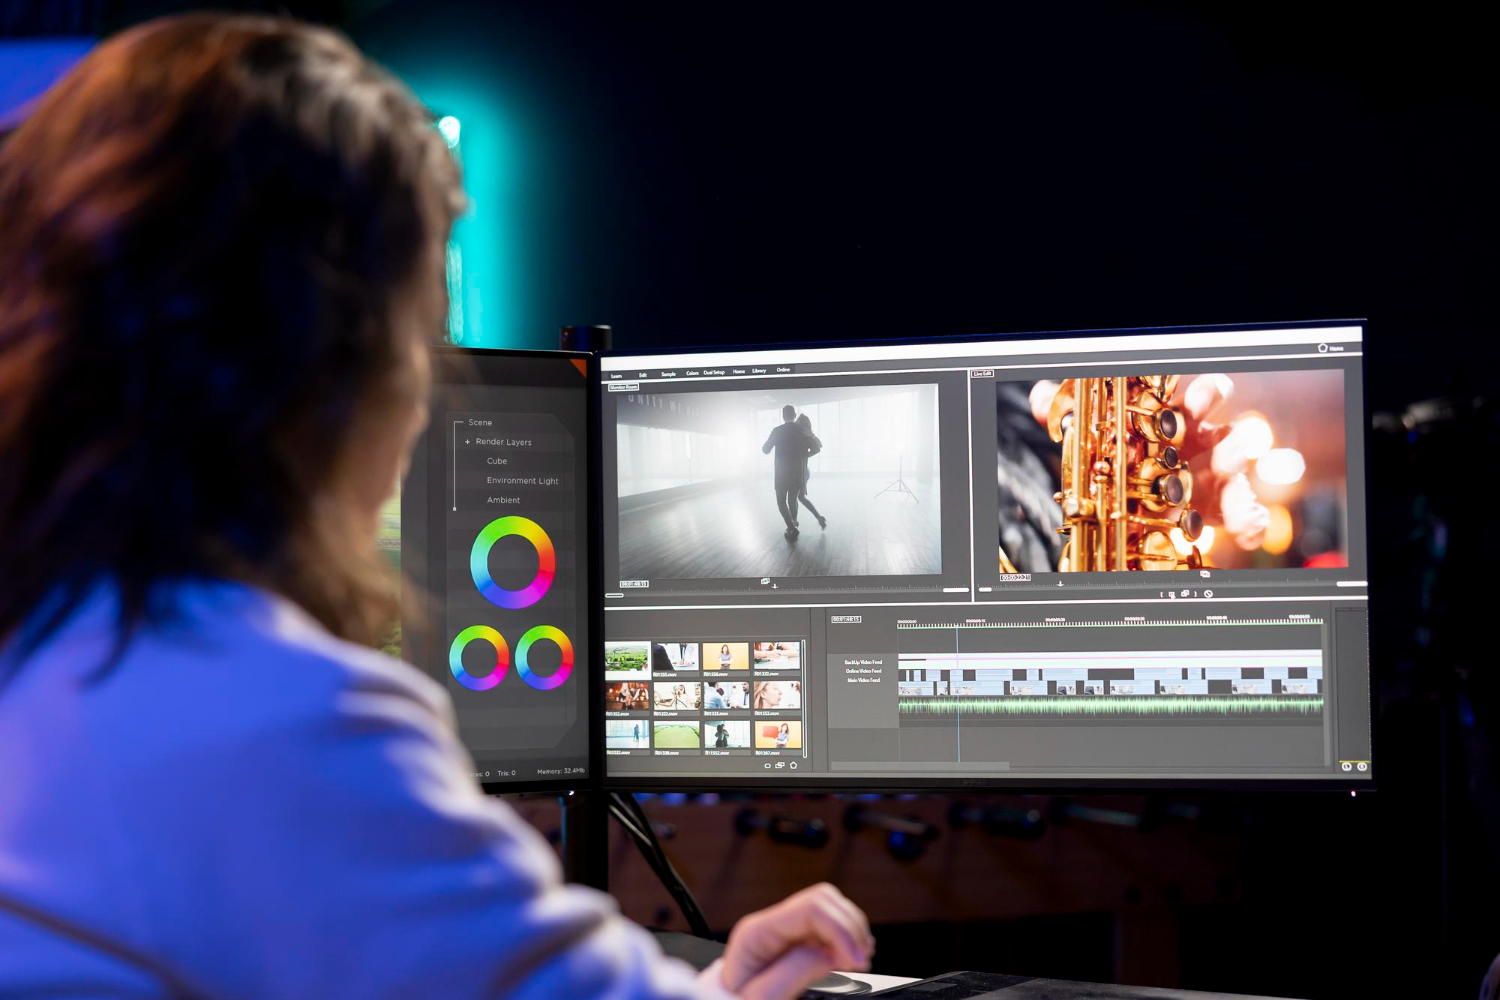
Color grading isn’t a filter slapped over finished footage. It’s part of the storytelling, the difference between a scene reading as cold and distant versus warm and intimate, purely through how the color and contrast are shaped. Done well, it guides where a viewer’s eye goes and how a scene feels before a single line of dialogue lands.
A moody thriller leaning into blue and teal tones, or a romance basking in golden hour warmth, both got that look in the grade, not on set. It refines mood and reinforces the story being told, and it matters roughly as much as lighting or camera work in how a finished piece actually lands with an audience. Skip it entirely and even well-shot footage tends to read as flat, missing the last ten percent that separates amateur from polished.
The gap between a raw camera file and a finished grade is often bigger than people expect the first time they see it side by side. Log or flat picture profiles, common on most modern cameras, deliberately capture a wide dynamic range at the cost of looking dull and washed out straight off the sensor. That flatness isn’t a mistake; it’s raw material specifically left uncommitted so a colorist has maximum room to shape the final look rather than working around baked-in decisions made automatically in-camera.
Choosing the Right Tool for Where You Are
The right color grading software depends heavily on what you’re actually making. A filmmaker chasing a specific cinematic look needs different depth than a YouTuber polishing weekly uploads or someone experimenting with short-form content for Instagram and TikTok.
Budget, learning curve, hardware compatibility, and export flexibility all factor in. Some of the tools below are full production suites loaded with node-based workflows and scopes; others are lightweight and built for speed. What actually matters is whether the tool gets out of your way and lets you make the decisions, rather than burying you in a settings panel you’ll never fully use.
Ten Color Grading Tools Worth Knowing
1. DaVinci Resolve
DaVinci Resolve is the reference point every other tool on this list gets measured against, and it earns that position honestly. Built around Hollywood-grade color correction, it packages precision color wheels, scopes, advanced tracking, keying, and a full node-based workflow into one application.
The free version is genuinely capable rather than a stripped-down trial: it supports high-resolution editing, real-time collaboration, and most of the professional color tools the paid version offers. The learning curve is real, node-based grading takes time to click, but the community tutorials and documentation are extensive enough that a motivated beginner can get functional within a few weeks. For anyone taking color grading seriously, even as a hobby, it’s close to a default starting point.
The node-based approach specifically is worth understanding before diving in, since it’s the biggest conceptual shift for anyone coming from a layer-based tool like Premiere. Rather than stacking adjustments on top of each other in one panel, Resolve lets you chain and branch individual correction nodes, one for exposure, one for a color cast fix, one for the creative look, which makes it far easier to isolate and revisit a single decision later without unraveling everything built on top of it.
2. Adobe Premiere Pro
Premiere Pro’s Lumetri Color panel makes grading accessible without requiring a colorist’s technical vocabulary. Sliders for exposure, contrast, shadows, and highlights give real control while staying approachable for editors who aren’t color specialists first.
For anyone already working inside the Adobe ecosystem, Premiere integrates directly with After Effects and Photoshop, which keeps an entire workflow inside one connected toolset rather than exporting and reimporting between separate applications. It doesn’t match DaVinci’s granular node-based control, but for content marketers, vloggers, and most digital creators, it covers cinematic-enough color correction without much friction.
3. Final Cut Pro
Apple dropped the “X” from the name a few versions back; it’s simply Final Cut Pro now, exclusive to Mac. It ships with a genuinely capable color inspector, color wheels, and curve adjustments, and the interface feels considerably smoother than most Windows-native alternatives for anyone already inside Apple’s ecosystem.
HDR support and real-time previews mean grading decisions show up instantly rather than after a render. Performance on Apple silicon in particular is excellent; it’s built specifically to take advantage of the hardware. It’s also a one-time purchase rather than a subscription, which changes the long-term cost math considerably compared to Adobe’s model.
4. Adobe After Effects
After Effects is known primarily for motion graphics and visual effects, but its color grading capability is genuinely strong for anyone doing stylized work, music videos, or content that calls for dramatic, deliberate color manipulation rather than naturalistic correction.
Adjustment layers, LUT support, and plugins like Magic Bullet or the built-in Lumetri effects give it real flexibility. It’s more technical than Premiere for grading specifically, and not the first tool to reach for if grading is your only goal. But for anyone already in After Effects for compositing or animation, folding color work into the same timeline is a natural extension rather than a separate step.
Also read: 10 best character animation software
5. VEGAS Pro
VEGAS Pro has a loyal following among Windows users who want a fast, intuitive environment for both editing and grading in one place. Its color grading panel offers wheels, curves, and LUT support that holds up well against pricier competitors, and the modular interface lets you rearrange the workspace around how you actually grade rather than a fixed layout.
Speed is the standout here: real-time playback, GPU acceleration, and quick export times matter a lot for creators who don’t want to sit through long renders to check a grade. It also works well as a bridge between beginner and advanced use, simple enough to start with, deep enough to grow into.
6. ColorDirector 365 by CyberLink
CyberLink’s dedicated color tool, now sold under the ColorDirector 365 subscription branding, remains one of the friendlier entry points into grading specifically, as opposed to editing more broadly. The interface avoids overwhelming a newcomer with too many simultaneous controls.
LUT support, split-toning, HSL adjustment, and keyframed color effects are all here, along with an AI-powered motion tracking feature that isolates and grades moving subjects individually, a capability that’s genuinely uncommon at this price point. For YouTubers and hobbyists specifically focused on grading rather than full editing, it’s a gentle but capable entry point.
7. Lightworks
Lightworks has decades of feature-film editing history behind it and remains sleek and surprisingly powerful for its size. Color wheels and vectorscopes cover what an intermediate user actually needs without the full node-based complexity of DaVinci Resolve.
Its free tier plus paid upgrade path lets you start without commitment and grow into the deeper toolset later. Real-time audio and video sync, along with solid export presets, make it a reasonable pick for indie filmmakers and documentary editors who want a balance of control and speed rather than maximum depth.
8. Kdenlive
One name that used to round out lists like this one, HitFilm, was discontinued by its parent company Artlist in early 2025, with the FXhome website taken offline entirely. Existing licenses still work, but there’s no path to buy or update it going forward. Kdenlive fills a similar niche from a different angle: a free, open-source, cross-platform editor with a genuinely active development community behind it.
Its color tools include curves, scopes, and LUT support built into its effects stack, enough for solid corrective and stylistic grading without a subscription or license fee of any kind. It won’t match DaVinci Resolve’s depth, but as a completely free, actively maintained option that isn’t tied to a company that might shut it down without warning, it’s a safer long-term bet than a lot of the smaller commercial tools in this space.
9. Filmora by Wondershare
Filmora is built for beginners, and it shows in a good way. Where DaVinci Resolve can feel intimidating on day one, Filmora offers a drag-and-drop experience that still gives real control over grading through basic wheels, temperature sliders, and contrast tools.
For creators making content for YouTube, Instagram, or TikTok, it’s an affordable, lightweight starting point that supports LUTs and built-in filters for quick stylization. It’s not built for big-budget productions, but for creators who value speed over granular control, it hits a genuine sweet spot.
10. Red Giant Color Tools (formerly Magic Bullet Suite)
Not standalone software, this is a set of plugins that extend programs like Premiere Pro and After Effects with dedicated color grading tools. Red Giant was acquired by Maxon in 2019, and its color tools, historically bundled and marketed as Magic Bullet Suite, are now sold as part of Maxon’s broader Red Giant lineup rather than under that specific bundle name, so check Maxon’s current offerings directly for exact packaging before buying.
What made this toolset distinctive is still there: the ability to build cinematic, stylized “looks” with skin tone protection, film grain emulation, and a large library of pre-built presets. It’s aimed squarely at editors who already have a solid workflow in Premiere or After Effects and want another layer of polish on top, not a replacement for either program.
Color Correction vs. Color Grading: Why the Distinction Matters
These two terms get used interchangeably constantly, and mixing them up leads to wasted effort. Color correction is the technical, fix-it-first step: balancing exposure, matching white balance across shots from the same scene, and neutralizing any color cast from bad lighting so every clip in a sequence looks like it belongs together. Grading comes after, once the footage is technically clean, and it’s the creative pass that gives a scene its actual mood and identity.
Skipping correction and jumping straight to a stylized grade is one of the most common mistakes beginners make. A dramatic teal-and-orange look applied over unbalanced, inconsistent footage just makes the inconsistency more visible instead of hiding it. Every tool on this list handles both stages, but the order matters regardless of which software you’re using.
Common Mistakes Worth Avoiding
Grading on an uncalibrated monitor. A laptop screen with aggressive auto-brightness or a blue-light filter enabled will make every grading decision unreliable, since what you’re seeing isn’t what a viewer on a different device will see. Even a basic calibration pass makes a meaningful difference.
Over-relying on LUTs without adjusting for the specific shot. A LUT built for one lighting setup applied blindly across footage shot in different conditions often produces inconsistent results from scene to scene. Treat a LUT as a starting point to tweak, not a finished look to apply and forget.
Crushing blacks or blowing out highlights chasing contrast. A dramatic, punchy look is tempting, but pushing contrast too far permanently destroys detail in the shadows or highlights that can’t be recovered afterward. Scopes exist specifically to catch this before it becomes a permanent mistake baked into an export.
Ignoring skin tones while chasing a mood. A stylized grade that makes every skin tone look sickly or unnatural undercuts the emotional connection a viewer has with the people on screen, even if the background colors look striking. Most professional grading tools include a vectorscope specifically to keep skin tones in a believable range while everything else in the frame gets pushed further.
A Basic Workflow That Works Across Any of These Tools
Regardless of which software you land on, the same rough sequence applies. Start with a technical correction pass: balance exposure and white balance shot by shot so everything from the same scene matches. Then apply a base look or LUT as a starting point for the mood you’re going for. From there, fine-tune with wheels and curves specifically for the story beat that scene is serving, a tense scene often benefits from cooler, more desaturated tones; a warmer, more intimate scene usually wants the opposite. Finally, check skin tones and shadow detail against a vectorscope and waveform monitor before exporting, since problems that are invisible on a bright laptop screen often show up clearly on a calibrated reference display or once uploaded to a streaming platform’s own compression.
Common Questions
Do I need expensive hardware to color grade professionally?
Not necessarily. DaVinci Resolve’s free version runs reasonably well on modest hardware, and most of the tools on this list scale their demands with project complexity. A dedicated GPU helps with render speed and real-time playback on larger projects, but it’s not a strict requirement to start learning and producing genuinely good-looking grades. A laptop bought within the last few years, even without a discrete GPU, is usually enough to learn on before hardware becomes an actual bottleneck.
What’s the difference between a LUT and a preset?
A LUT (Look-Up Table) is a mathematical transformation applied uniformly to color values, often used to convert camera-specific log footage into a standard color space or to apply a consistent stylistic look. A preset is usually a broader bundle of settings, sometimes including a LUT alongside other adjustments like grain, vignetting, or sharpening, packaged together as a one-click starting point.
Can I switch between these tools on the same project?
Technically yes, through export and reimport, but grading decisions and node structures generally don’t transfer cleanly between different applications. It’s far more efficient to pick one tool for a given project’s full grading pass rather than bouncing between two different color engines partway through.
Is DaVinci Resolve’s free version really enough for professional work?
For a huge share of professional and semi-professional work, yes. The paid Studio version adds features like advanced noise reduction, additional GPU acceleration, and some collaboration tools that matter more on larger productions, but the free version’s core color grading toolset is the same engine used on real film and television work.
Finding Your Own Match
Picking a color grading tool is a personal decision more than a technical one, closer to choosing a camera or a pair of headphones than picking the objectively “best” option on a spec sheet. It should fit your actual workflow and the kind of stories you’re telling, whether that’s documentary work, music videos, social content, or full-length films.
Don’t default to whatever tool is most talked about if it doesn’t fit how you actually work. Try the free tiers, experiment with LUTs, push contrast further than feels comfortable and then pull it back. Grading rewards trusting your own eye over following a tutorial’s exact settings, since the goal is a specific feeling for a specific piece of footage, not a formula that works identically every time.
Whichever tool ends up on your machine, the software is genuinely the smaller half of the equation. A colorist with a strong eye and a basic free tool routinely produces more compelling work than someone with every paid plugin on this list and no clear sense of what mood they’re actually chasing. Learn the fundamentals of contrast, saturation, and color theory first, and the specific software becomes a much smaller decision than it feels like right now.
Interesting reads:
Best software for motion graphics