
Your Traffic Is an Unsold Asset
You built an Easy Digital Downloads store. You invested in quality products, optimized your site, created content that ranks, and nurtured an audience. Your traffic numbers are growing. Your brand carries authority in your niche.
And yet, you are only monetizing a fraction of that traffic.
Every visitor to your site sees your products. Some buy. Most do not. The ones who do not buy still have value, because they represent verified attention in your niche. Companies, tool makers, service providers, and fellow creators in your space would pay to get their brand in front of those eyeballs.
Selling ad packages on your EDD site transforms your traffic from a cost center into a revenue center. Instead of only earning when someone buys a product, you earn every time someone visits your site, regardless of whether they purchase.
This is not about plastering your site with Google AdSense and hoping for the best. This is about building a structured, professional advertising business on top of your existing digital product store. You create defined ad packages, set pricing based on real traffic data, and sell them to advertisers who want access to your audience.
In this guide, we will walk through exactly how to set this up using WB Ad Manager Pro and Easy Digital Downloads, from package design through to automated renewals.
Why Direct Ad Sales Beat Ad Networks Every Time
Before we dive into the how, let us establish why direct ad package sales are worth the effort compared to simply plugging in an ad network.
Revenue Comparison
Ad networks like Google AdSense typically pay $2-10 CPM (cost per thousand impressions) for most WordPress and digital product niches. The network takes a cut, serves whatever ads their algorithm chooses, and you have minimal control.
Direct ad sales to relevant advertisers in your niche routinely command $15-75 CPM. Why? Because you are selling targeted access to a specific, qualified audience. An advertiser paying $50 CPM to reach WordPress developers on your EDD plugin site knows exactly who they are reaching. That precision is worth a premium.
Here is the math for a site with 10,000 monthly pageviews:
- Ad network revenue: 10,000 impressions x $5 CPM = $50/month per ad slot
- Direct sale revenue: 10,000 impressions x $35 CPM = $350/month per ad slot
With 3-4 ad slots, that is the difference between $150-200/month and $1,050-1,400/month. Over a year, direct sales generate $10,000-15,000 more revenue from the same traffic.
Brand Control
With ad networks, you have limited say over what appears on your site. You might block categories, but you cannot handpick advertisers. With direct sales, you choose exactly who advertises on your site, ensuring every ad aligns with your brand and adds value for your visitors.
Relationship Building
Direct advertiser relationships become partnerships. An advertiser who buys a monthly package from you is invested in your success because your traffic growth is their impression growth. These relationships often evolve into sponsored content deals, affiliate partnerships, and cross-promotional opportunities worth far more than the initial ad package.
Designing Tiered Ad Packages
Effective ad packages are not one-size-fits-all. Different advertisers have different budgets, goals, and commitment levels. A tiered package structure lets you serve all of them while maximizing revenue.
Tier 1: Starter Package
Designed for small businesses, indie developers, and first-time advertisers who want to test the waters.
- Duration: 1 month (no commitment beyond the initial period)
- Placement: Sidebar widget ad (single position)
- Format: Static image (300×250 or 300×600)
- Targeting: Site-wide (no category targeting)
- Reporting: Monthly impression and click report
- Price range: $50-150/month (varies by traffic)
This tier serves as a low-risk entry point. Advertisers can evaluate whether your audience responds to their messaging before committing to larger packages.
Tier 2: Growth Package
For established businesses ready to invest in sustained visibility.
- Duration: 3 months (quarterly commitment)
- Placements: Sidebar widget + in-content blog ad (2 positions)
- Format: Static image or animated GIF
- Targeting: Category-specific targeting available
- Reporting: Bi-weekly impression, click, and CTR reports
- Bonus: One sponsored blog post mention per quarter
- Price range: $200-500/month (billed quarterly with 10% discount)
The quarterly commitment provides stable, predictable revenue. The category targeting lets advertisers reach specific audience segments, increasing their ROI and your ability to charge premium rates.
Tier 3: Premium Package
For companies that want maximum visibility and first-mover advantage.
- Duration: 6 or 12 months (semi-annual or annual commitment)
- Placements: Header banner + sidebar + in-content + footer (4 positions)
- Format: All formats including HTML5 and responsive
- Targeting: Advanced targeting by category, customer status, and geography
- Reporting: Weekly detailed reports with custom dashboards
- Bonus: Quarterly sponsored blog post, newsletter feature, social media mentions
- Price range: $500-2,000/month (billed annually with 20% discount)
- Exclusivity: Category exclusivity available (no competing ads in same category)
Premium packages are where the real revenue lives. Annual commitments provide cash flow stability, and the higher service level justifies premium pricing.
Custom Enterprise Packages
For high-value advertisers, offer custom packages that bundle everything: exclusive placements, dedicated landing pages, integration with your product recommendations, and joint webinar or content partnerships. These deals are negotiated individually and can range from $2,000-10,000+/month for high-traffic, niche-authority sites.
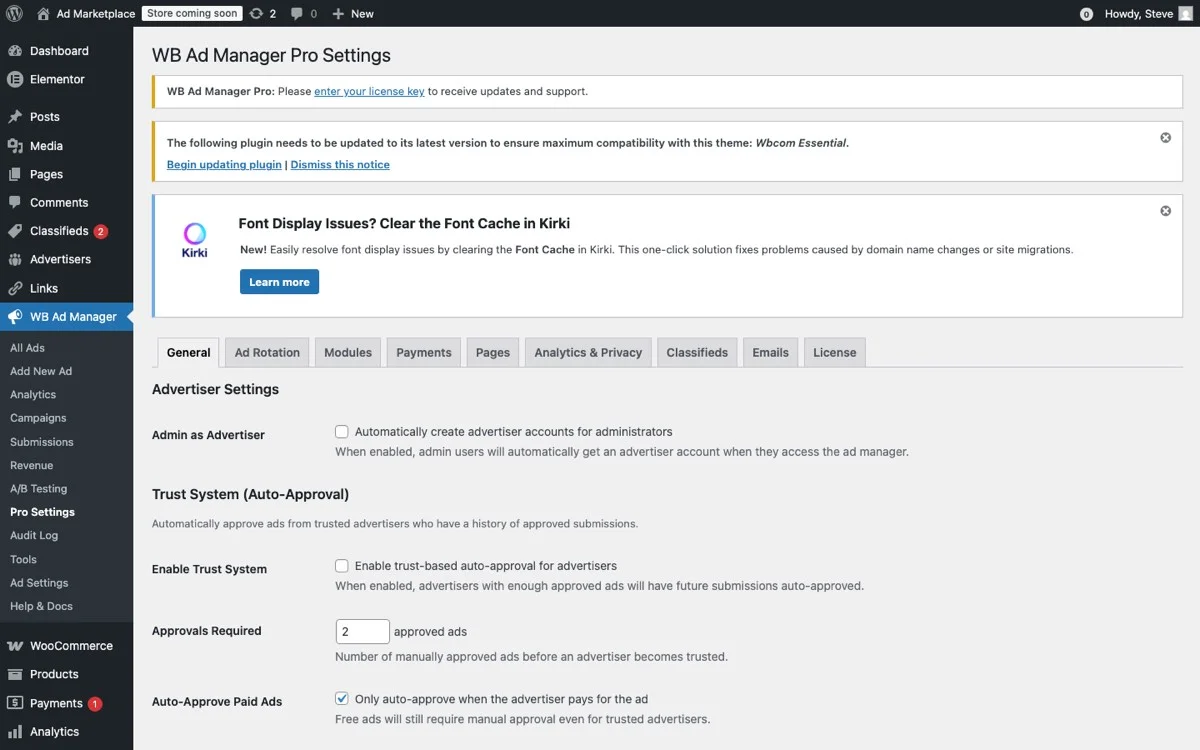
Package and pricing configuration, set tiers, durations, placement bundles, and billing models
Pricing Your Ad Packages Based on Traffic Data
Pricing is the most common stumbling block for first-time ad sellers. Price too high and you will not attract advertisers. Price too low and you are undervaluing your audience. Data-driven pricing removes the guesswork.
Step 1: Know Your Numbers
Before setting any prices, document these metrics:
- Monthly pageviews: Total and per-section (homepage, blog, product pages, category pages).
- Unique monthly visitors: How many individual people visit your site.
- Average session duration: How long visitors stay, indicating engagement quality.
- Audience demographics: Location, professional role, company size (from Google Analytics).
- Traffic trend: Is your traffic growing, stable, or declining? Growing traffic justifies premium pricing.
Step 2: Calculate Your Base CPM
Your base CPM should reflect your niche value and traffic quality. Use these benchmarks as starting points:
- General WordPress content: $10-20 CPM
- WordPress development/technical: $20-40 CPM
- eCommerce and business tools: $25-50 CPM
- Enterprise software and SaaS: $40-75 CPM
If your site focuses on WordPress plugin development and attracts 10,000 monthly pageviews, a reasonable starting CPM for direct sales is $25-35.
Step 3: Price Each Placement
Not all placements are equal. Premium positions command premium rates:
- Header banner: 1.5x base CPM (highest visibility)
- In-content blog ads: 1.3x base CPM (highest engagement)
- Sidebar ads: 1.0x base CPM (standard)
- Footer ads: 0.5x base CPM (lowest visibility)
For a $30 base CPM on 10,000 pageviews:
- Header banner: $30 x 1.5 x 10 = $450/month
- In-content blog: $30 x 1.3 x 6 (60% blog traffic) = $234/month
- Sidebar: $30 x 1.0 x 10 = $300/month
- Footer: $30 x 0.5 x 10 = $150/month
Step 4: Apply Package Discounts
Encourage longer commitments with tiered discounts:
- Monthly (no commitment): Full price
- Quarterly (3 months): 10% discount
- Semi-annual (6 months): 15% discount
- Annual (12 months): 20% discount
These discounts are investments in revenue stability. An advertiser locked in for 12 months at a 20% discount is far more valuable than one who buys month-to-month for 3 months and disappears.
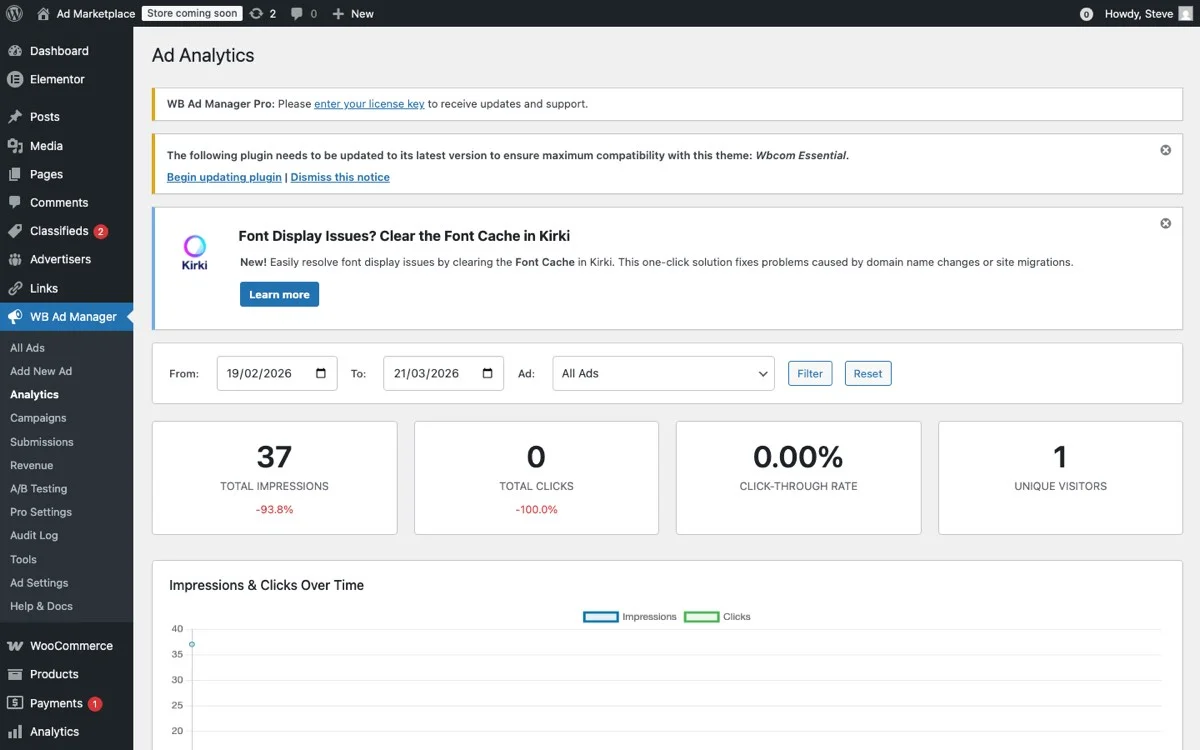
Traffic analytics, use real impression and click data to price your ad packages accurately
Advertiser Purchase and Onboarding Flow
The purchase experience matters. A clunky, manual process will lose potential advertisers. A smooth, self-service flow that lets advertisers browse packages, purchase, and submit their ad creatives will maximize conversions.
Building the Advertiser-Facing Experience
With WB Ad Manager Pro integrated with Easy Digital Downloads, the purchase flow looks like this:
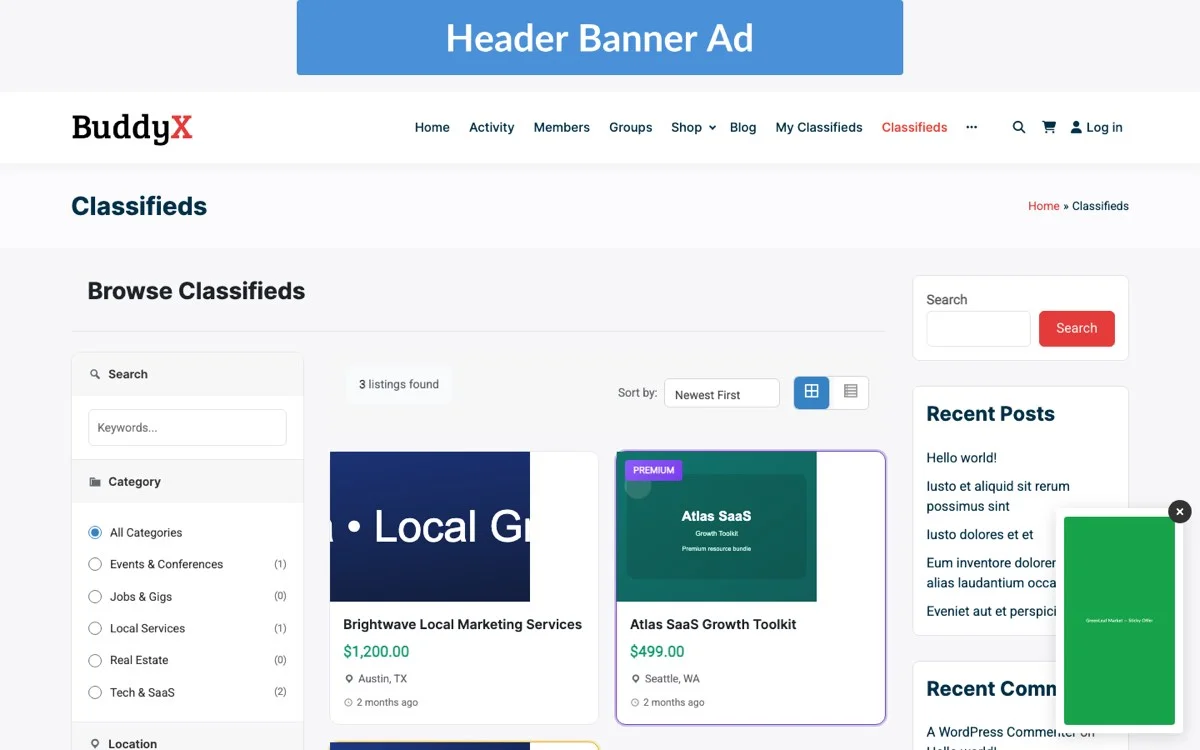
- Advertising page: Create a dedicated “Advertise With Us” page that showcases your packages, traffic stats, audience demographics, and pricing.
- Package selection: Each tier is listed as an EDD product with clear descriptions of what is included.
- Cart and checkout: Advertiser selects a package and checks out through your standard EDD checkout. They pay immediately.
- Creative submission: After purchase, the advertiser is prompted to upload their ad creative (images, links, tracking pixels) through a submission form.
- Review and activation: You review the submitted creative, approve it, and WB Ad Manager Pro activates the ad in the designated placement.
Creating Your Media Kit
Professional advertisers expect a media kit. This does not need to be elaborate, but it should include:
- Traffic overview: Monthly pageviews, unique visitors, growth trend.
- Audience profile: Who visits your site, what they do, what they buy.
- Available placements: Visual mockups showing where ads appear on your site.
- Package details: Tiers, pricing, what is included.
- Performance data: Average CTR for each placement (once you have data).
- Testimonials: Quotes from existing advertisers (once you have them).
Streamlining Creative Approval
Ad creative review should be fast but thorough. Establish clear guidelines upfront:
- Accepted formats: JPEG, PNG, GIF, HTML5 (specify sizes for each placement).
- File size limits: Keep page load impact minimal (typically under 150KB per ad).
- Content guidelines: No competing products, no misleading claims, no inappropriate content.
- Turnaround time: Commit to reviewing and activating ads within 24-48 hours of submission.
Managing Inventory Without Overselling
Ad inventory management is what separates amateur ad sellers from professionals. Overselling means you promised the same ad slot to two different advertisers. Underselling means revenue-generating placements sit empty when they could be earning money.
Define Your Total Inventory
Start by mapping every available ad placement on your site:
- Homepage: Header banner (1 slot), sidebar (2 slots), below-content (1 slot)
- Blog posts: In-content position 1 (1 slot), in-content position 2 (1 slot), sidebar (2 slots)
- Product pages: Below-description (1 slot), sidebar (1 slot)
- Category pages: Header (1 slot), sidebar (1 slot)
Total: approximately 12 individual ad slots across your site. Some may be shared (sidebar appears on multiple page types), so calculate actual unique placements carefully.
Implementing Inventory Controls
WB Ad Manager Pro provides inventory management features that prevent overselling:
- Slot capacity limits: Each placement has a defined maximum number of advertisers. A sidebar slot that rotates between 3 ads is clearly marked as having 3 available positions.
- Availability calendar: See at a glance which slots are sold, which are available, and when current bookings expire.
- Automatic sold-out handling: When a placement reaches capacity, it is automatically removed from available packages or marked as sold out on your advertising page.
- Waitlist functionality: Interested advertisers can join a waitlist for sold-out placements, ensuring you fill spots immediately when they open up.
Rotation vs. Exclusive Placements
You have two models for each placement:
Rotation: Multiple ads share a single placement, rotating on each page load or at timed intervals. This increases your total inventory (3 rotation slots where there was 1 exclusive slot) but reduces each advertiser’s impression share. Price accordingly, typically at 40-50% of the exclusive rate per rotation slot.
Exclusive: One advertiser owns the entire placement. Every impression goes to them. Premium pricing applies, but inventory is limited. Exclusive placements work best for header banners and premium positions where visibility impact matters most.
Handling Category Exclusivity
Some advertisers will request category exclusivity, meaning no competing ads appear alongside theirs. This is a premium feature you can charge extra for:
- Standard category placement: base price
- Category exclusivity: 1.5-2x base price
Track category assignments in WB Ad Manager Pro to ensure you never accidentally sell a hosting ad slot on WordPress-related pages to two competing hosting companies.
Automating Renewals and Expirations
Manual ad management does not scale. If you are individually tracking expiration dates, sending renewal reminders, and manually activating and deactivating ads, you will hit a wall at about 5-10 concurrent advertisers. Automation is essential.
Expiration Handling
When an ad package reaches its end date, the system needs to:
- Deactivate the ad: Remove it from the rotation or placement automatically. No expired ads should ever display on your site.
- Notify the advertiser: Send an email 7 days before expiration, 3 days before, and on the expiration date, inviting them to renew.
- Notify you: Alert you that a slot is about to open up so you can reach out to waitlisted advertisers or backfill with ad network placements.
- Backfill empty slots: If a slot goes unsold after expiration, automatically fill it with a default ad (your own promotion, an ad network ad, or a house ad for your products).
Renewal Automation
The ideal renewal flow removes friction while giving advertisers control:
- Auto-renewal option: Advertisers can opt into auto-renewal at checkout. Their card is charged automatically when the current period ends, and the ad continues running without interruption.
- Renewal discount: Offer returning advertisers a small loyalty discount (5-10%) to incentivize continuity.
- Easy upgrade path: Make it simple for Starter package advertisers to upgrade to Growth or Premium when they renew.
- Cancellation handling: If an advertiser cancels, their ad runs through the end of the paid period and then deactivates automatically.
Using EDD Recurring Payments
If you are using EDD’s Recurring Payments extension, ad packages integrate naturally as subscription products. Each package tier becomes a subscription with the appropriate billing cycle:
- Starter: Monthly subscription
- Growth: Quarterly subscription
- Premium: Annual subscription
WB Ad Manager Pro connects with these subscription states, so when a subscription is active, the ad is active. When it expires or is cancelled, the ad deactivates. No manual intervention needed.
Revenue Projections and Growth Path
Let us model what a mature ad package business looks like at different traffic levels.
10,000 Monthly Pageviews (Starting Out)
| Package | Slots Sold | Monthly Revenue |
|---|---|---|
| Starter (sidebar, $75/mo) | 2 | $150 |
| Growth (sidebar + in-content, $300/mo) | 1 | $300 |
| Premium (all positions, $800/mo) | 0 | $0 |
| Total | $450/month ($5,400/year) |
50,000 Monthly Pageviews (Growing)
| Package | Slots Sold | Monthly Revenue |
|---|---|---|
| Starter ($200/mo) | 3 | $600 |
| Growth ($600/mo) | 2 | $1,200 |
| Premium ($1,500/mo) | 1 | $1,500 |
| Total | $3,300/month ($39,600/year) |
100,000+ Monthly Pageviews (Established)
| Package | Slots Sold | Monthly Revenue |
|---|---|---|
| Starter ($400/mo) | 4 | $1,600 |
| Growth ($1,200/mo) | 3 | $3,600 |
| Premium ($3,000/mo) | 2 | $6,000 |
| Enterprise (custom) | 1 | $5,000 |
| Total | $16,200/month ($194,400/year) |
These numbers are not fantasy. They are based on real CPM rates for niche technical audiences and reasonable sell-through rates. The key variables are your niche value, your ability to attract direct advertisers, and how well you manage inventory and relationships.
Getting Your First Advertiser
The hardest part of selling ad packages is getting your first paying advertiser. Once you have one, the second and third come much more easily because you have proof of concept and (ideally) a testimonial.
Start with Your Existing Network
You already use tools and services to run your EDD store. Reach out to those companies:
- Your hosting provider
- Your email marketing platform
- Your payment processor
- Plugin and theme companies whose products complement yours
- Freelancers and agencies who serve your audience
These companies already have marketing budgets and understand your audience. A warm introduction from a customer converts far better than a cold pitch.
Offer a Discounted Trial
For your first 2-3 advertisers, offer a heavily discounted first month (50% off) in exchange for a testimonial and the right to use them as a case study. The revenue from a discounted package is less important than establishing credibility.
Pitch with Data
When approaching potential advertisers, lead with numbers:
- “Our site reaches 10,000 WordPress developers monthly.”
- “Our average visitor spends 4.5 minutes on the site.”
- “60% of our traffic comes from the US, UK, and Canada.”
- “Our blog posts on WooCommerce topics receive 3,000 pageviews monthly.”
Specificity signals professionalism and gives advertisers confidence that their investment will reach the right people.
Implementation Checklist
Here is your action plan for launching ad packages on your EDD site:
- Install WB Ad Manager Pro and configure your ad placements.
- Map your ad inventory: Document every available placement, its page type, and impression estimates.
- Design your package tiers: Start with 3 tiers (Starter, Growth, Premium) and refine based on demand.
- Set pricing: Use your traffic data and the CPM benchmarks above to set data-driven prices.
- Create your advertising page: Build a professional page showcasing your packages, audience, and pricing.
- Build your media kit: A one-page PDF with traffic stats, audience info, and package details.
- Set up EDD products: Create each package as an EDD product with recurring billing.
- Configure automation: Set up expiration handling, renewal reminders, and backfill defaults.
- Reach out to 10 potential advertisers: Start with your existing network and tools you already use.
- Offer launch pricing: Discount your first few packages to build testimonials and case studies.
The businesses that grow the fastest are the ones that build multiple revenue streams. Your product sales are the foundation, but ad packages, affiliate partnerships, and sponsored content are the floors you build on top. Each one makes the overall structure more stable and more profitable.
Your traffic has value beyond product sales. Start selling it.
Get WB Ad Manager Pro and launch your ad package business today.